Adalogical Ænigma #7Walkthrough of the Example PuzzleGreetings, gentle patron!
What follows is a detailed description of how one might go about solving the example puzzle shown on the ænigma paper. I hope that you find it useful. For a copy of the ænigma itself, along with an abundance of other solving aids, please return to the main page for this ænigma.
Dedicated to your puzzle enjoyment,

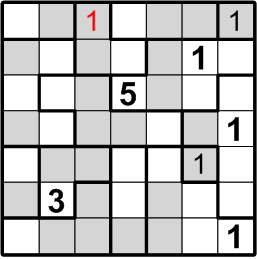
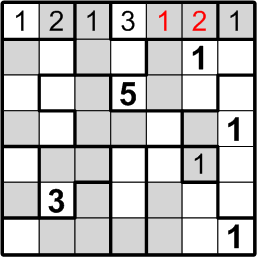
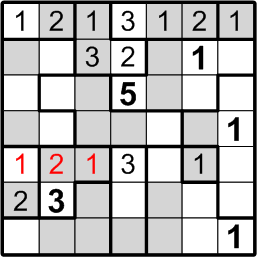
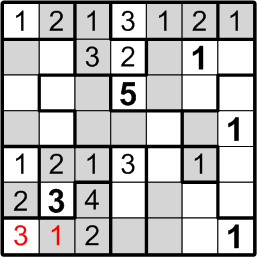
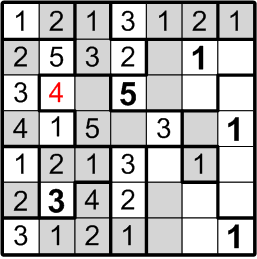
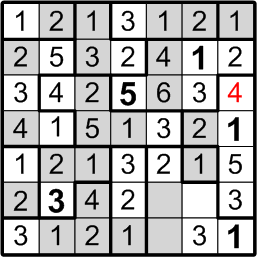
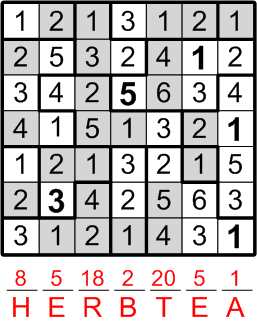
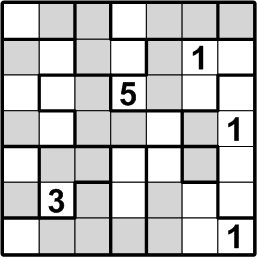 This is the example puzzle exactly as presented on the ænigma paper. We are given that we should place numbers in every square of the grid such that (a) every heavily outlined region contains all of the numbers between 1 and the size of that region, and (b) if two instances of the same number N appear in the same row or column, they must be separated by at least N squares that do not contain the number N.
Are the rules quite clear, then? Jolly good! Let's get started!
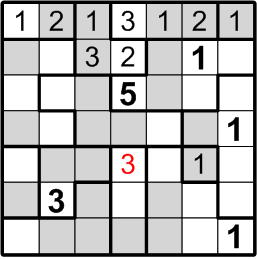
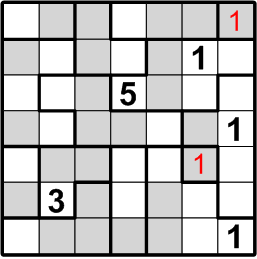 We begin by filling in the simplest placements possible: the two regions in the grid that each contain only a single square. Since those regions have size 1, by rule (a) above, the number in each such singular square must be a “1”!
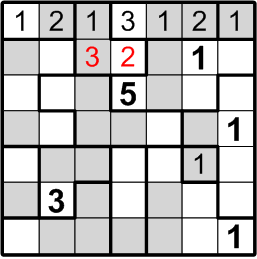
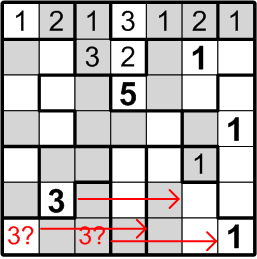
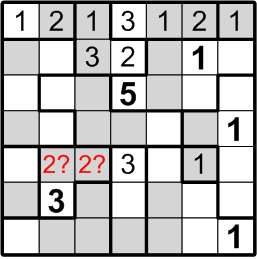
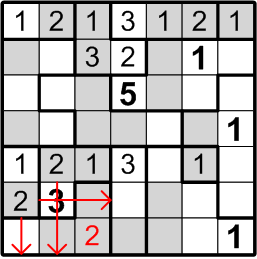
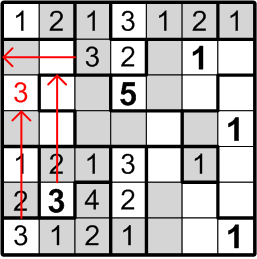
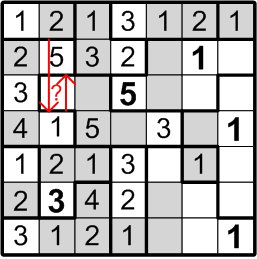
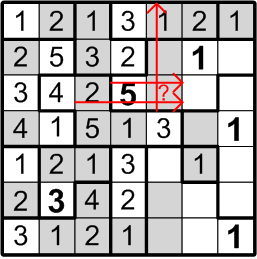
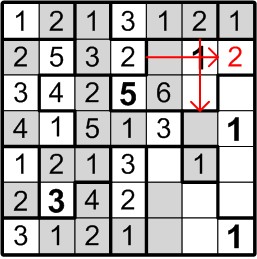
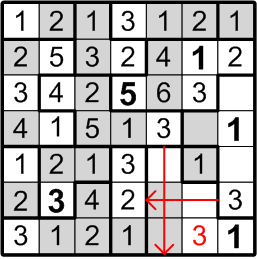
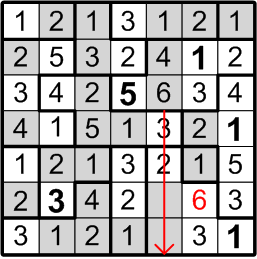
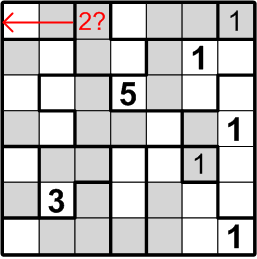 Our next target is much subtler. Consider the square labelled here with “2?”: could that square contain a “2”, as indicated? If it did, by rule (b) above, we would not be permitted to place another “2” in either of the two squares immediately to the left, as notated by the red arrow in the diagram. But that would pose a problem for the two-square region covered by that arrow: by rule (a) above, it must contain both a “1” and a “2”!
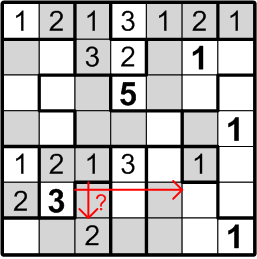
We may thus conclude that the square labelled with “2?” does not, in fact, contain a “2”.
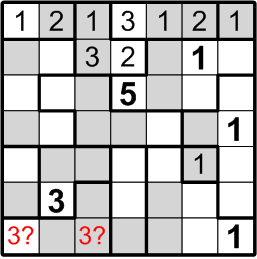
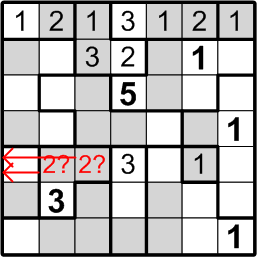
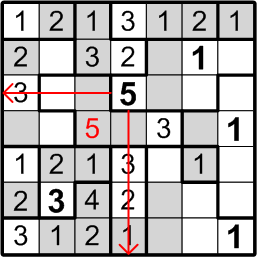
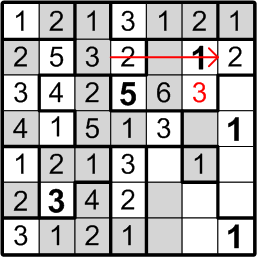
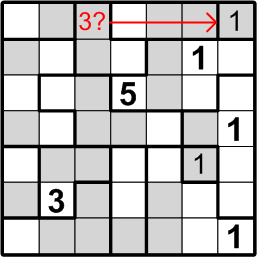 Well then, could that same square perhaps contain a “3”? By the very same sort of reasoning, this time referring to the three-square region to its right, we may similarly conclude otherwise: if there were a “3” in the indicated square, the three-square region would be denied its own “3”, contradicting rule (b) above.
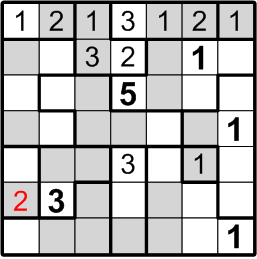
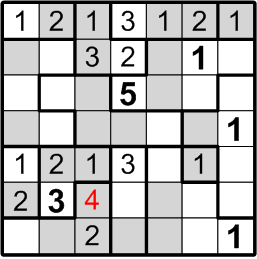
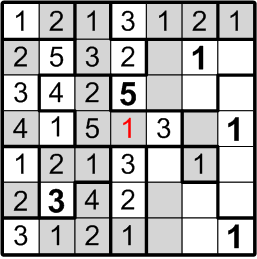
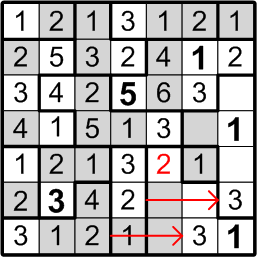
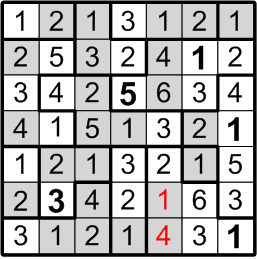
 The square that has been our focus for the past little while lies within a three-square region, but may not contain either a “2” or a “3”. By rule (a), it must contain a number between 1 and 3, so we are left with only a single option and are thus forced to conclude that it contains a “1”.
This kind of reasoning, in which we logically eliminate all but one possible number to place within a square, will arise multiple times in the remainder of this little ænigma, so for brevity, we will find it helpful to give a name to this sort of deduction: I shall call it “number elimination”.
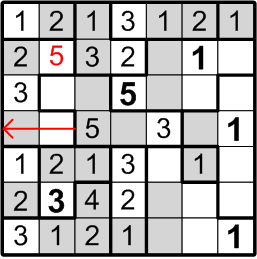
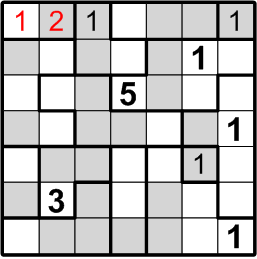 We may now confidently place numbers in the two-square region in the upper left corner: there are only two ways to fill in the numbers, and by rule (b) we may not put that region's “1” adjacent to the “1” we just placed. That leaves only the placement shown here.
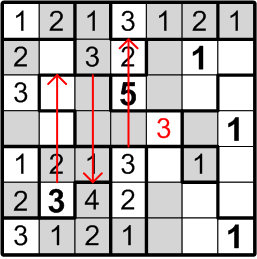
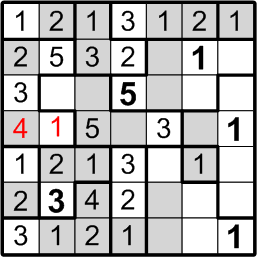
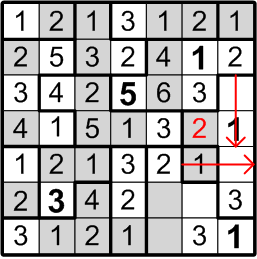
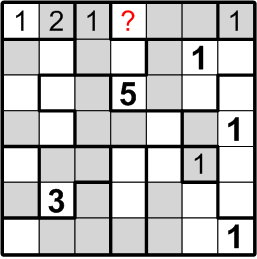 Now let us consider the square labelled with the question mark here. It lies within a three-square region, but it can be neither a “1” (because there's another “1” immediately adjacent) nor a “2” (because there's another “2” just one further square away). Aha! It's another instance of our number elimination deduction!
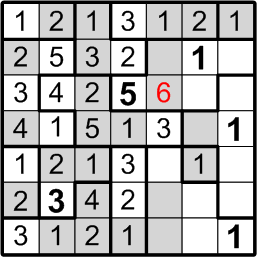
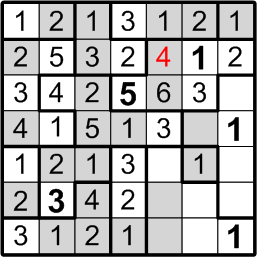
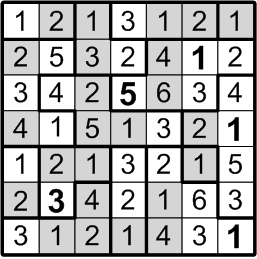
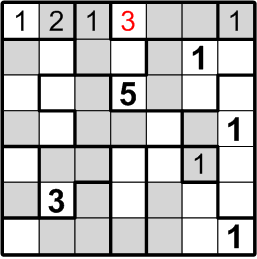 By number elimination (doesn't that have such a lovely, authoritative ring to it?), we may thus conclude that our subject square must contain a “3”.
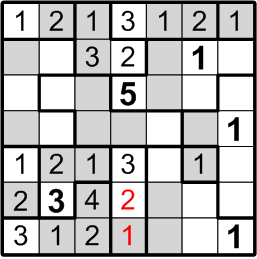
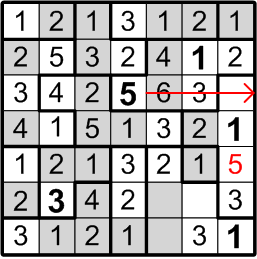
 Once again, there are only two ways to fill in the remainder of that three-square region, and one of those would place multiple “1” squares too close together. We are thus forced into the placement you see here.
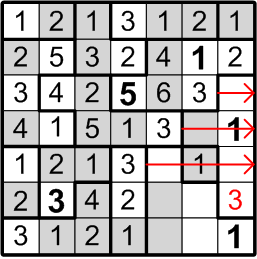
 Similarly, we may now return to the region where we began this sequence of deductions, which also has only two squares left unfilled. Again, one of the two possible placements would place numbers too close to one another (in this case, the “3”s), so we may confidently adopt the placement lacking that issue.
This exhausts the straightforward deductions left to be made, at present, in the upper part of the grid. For further progress, we shall need to look farther afield.
 ...coming...
 ...coming...
 ...coming...
 ...coming...
 ...coming...
 ...coming...
 ...coming...
 ...coming...
 ...coming...
 ...coming...
 ...coming...
 ...coming...
 ...coming...
 ...coming...
 ...coming...
 ...coming...
 ...coming...
 ...coming...
 ...coming...
 ...coming...
 ...coming...
 ...coming...
 ...coming...
 ...coming...
 ...coming...
 ...coming...
 ...coming...
 ...coming...
 ...coming...
 ...coming...
 ...coming...
 ...coming...
 ...coming...
 ...coming...
 ...coming...
 Here we pause for just a moment to savor ...
All that remains now is to discover this ænigma's final answer.
 We are told to ...
Following those instructions, we end up spelling out a soothingly apropos final answer phrase: “HOT TEA”.
Bravo, we've done it! Now return to your efforts on the original ænigma!
|
Shopping Cart |